CURT 56412 sõidukipoolne kohandatud 4 kontaktiga haagise juhtmestik, sobib valitud Mitsubishi Outlander PHEV, must

Brand:‎CURT

1.8/5

83.76

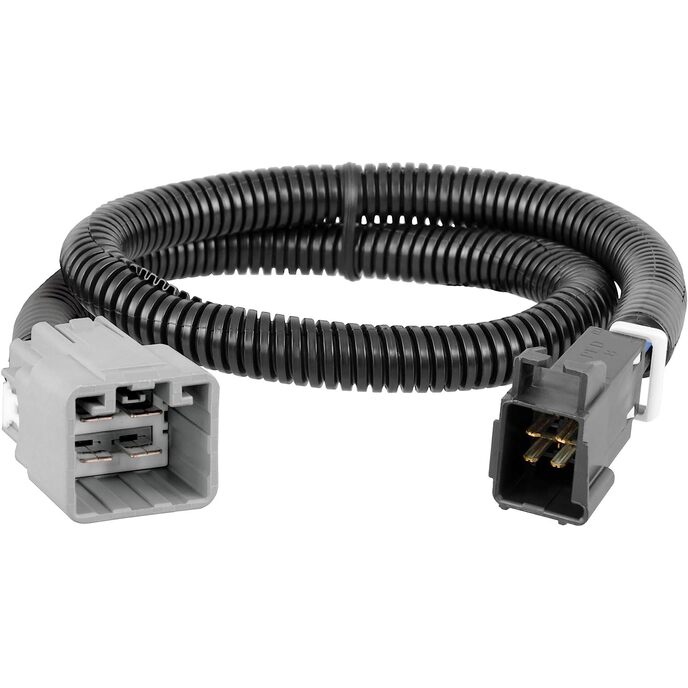
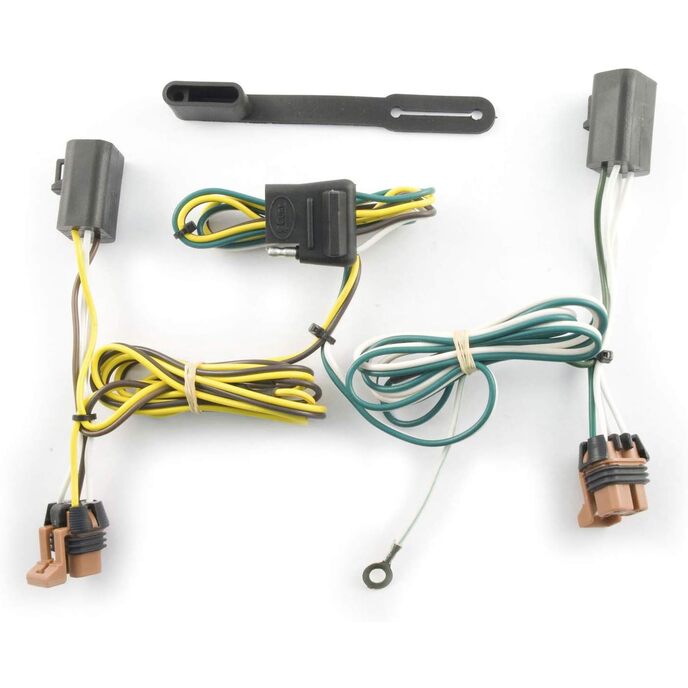
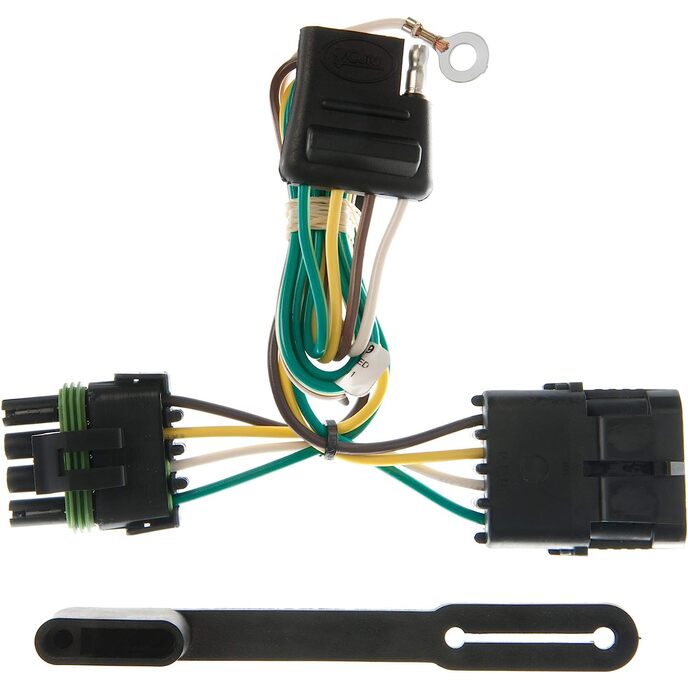
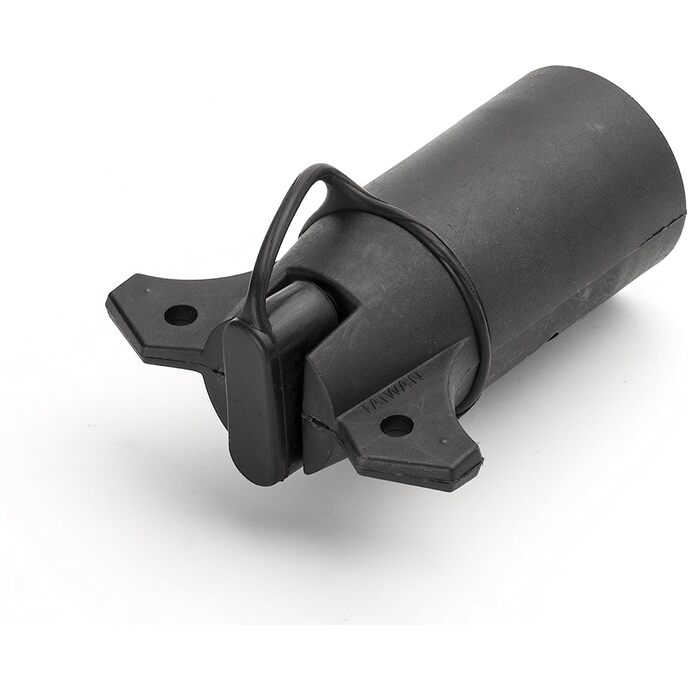
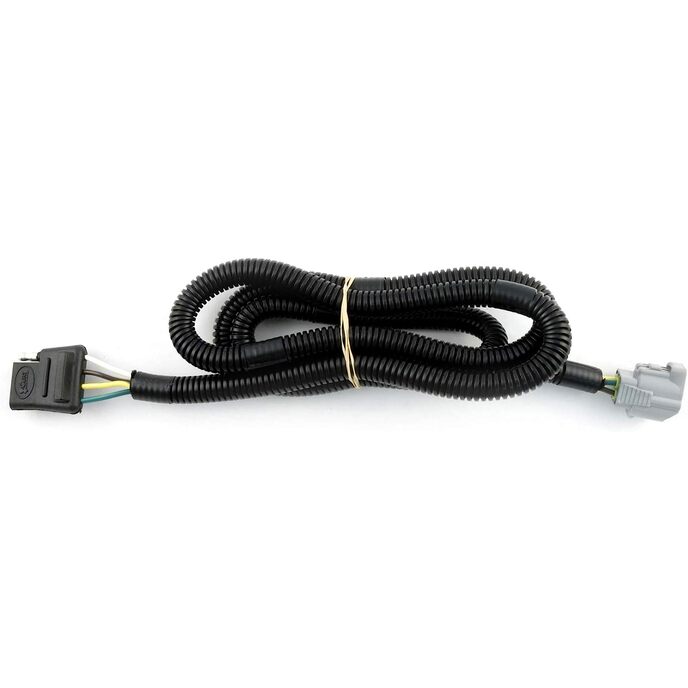
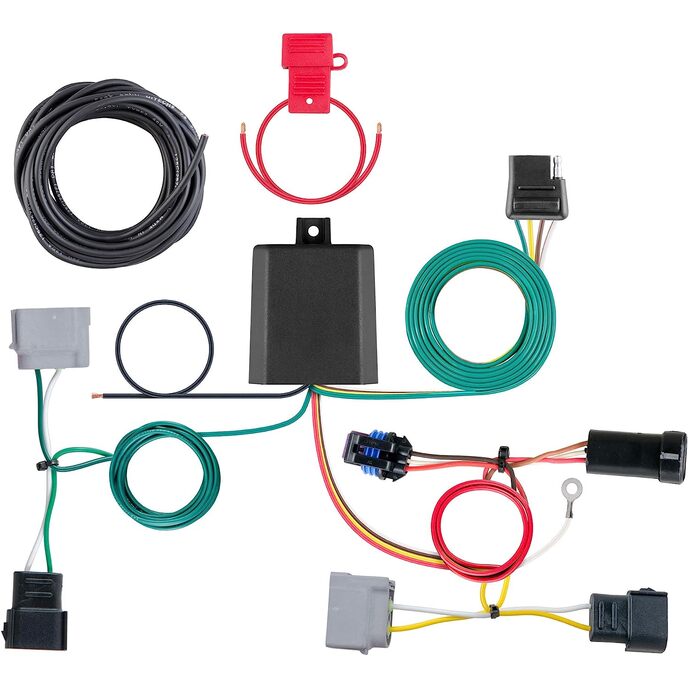
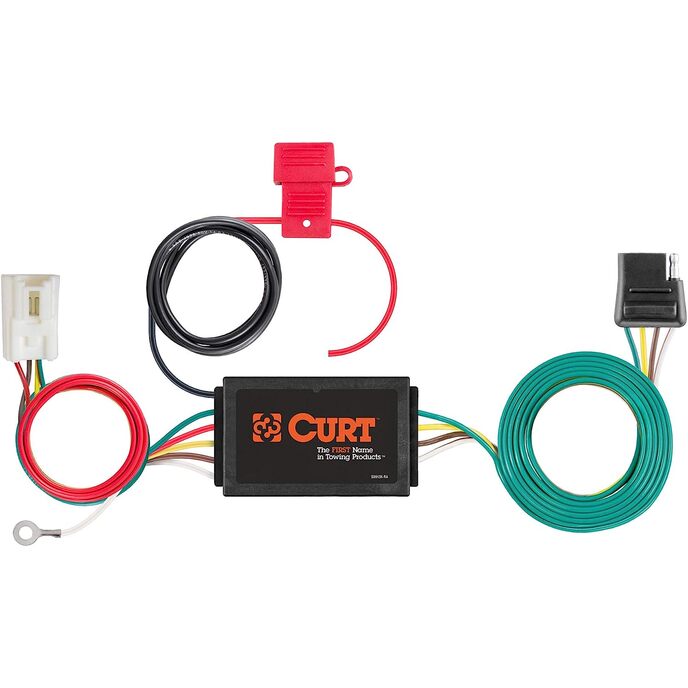
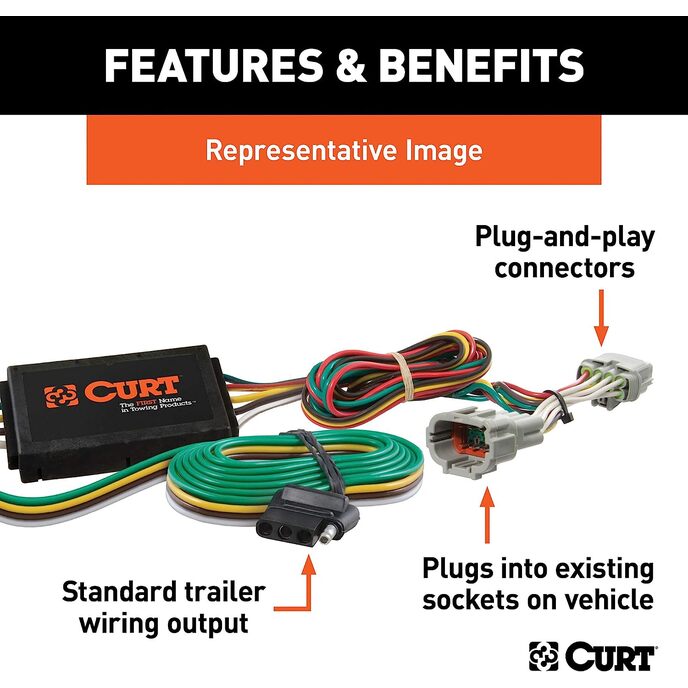
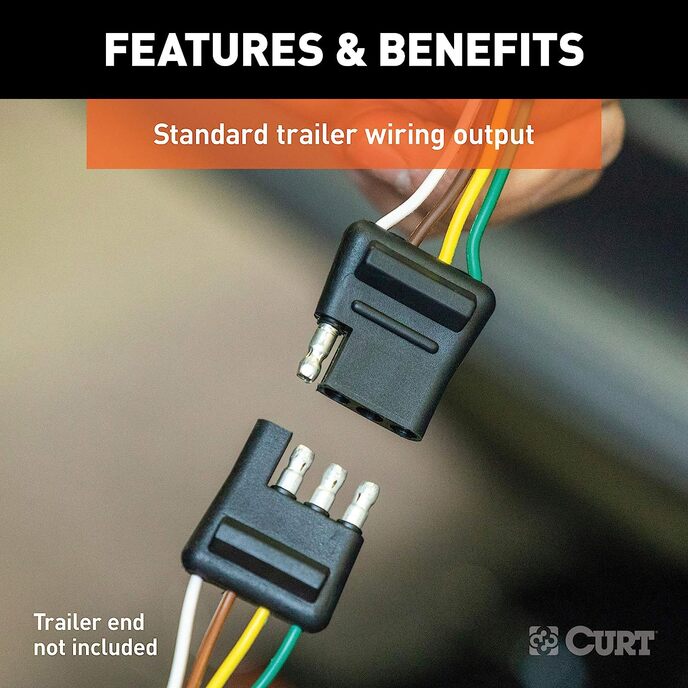
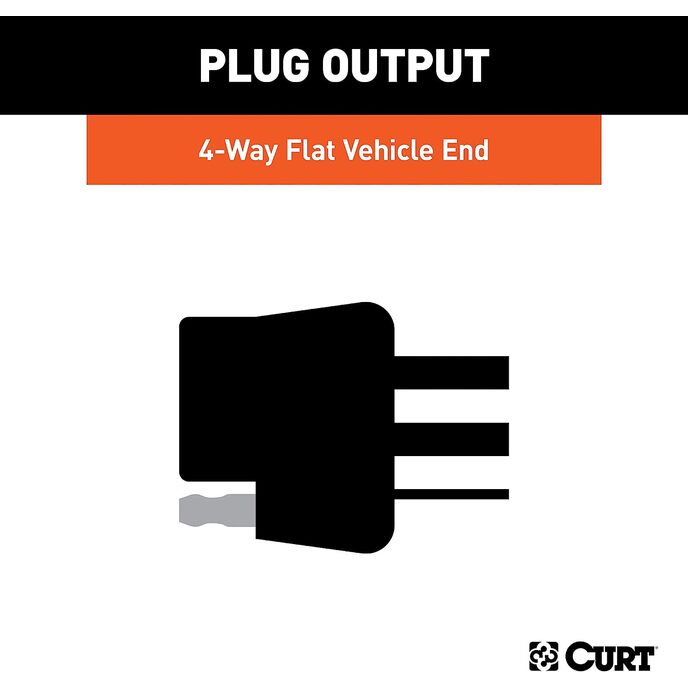
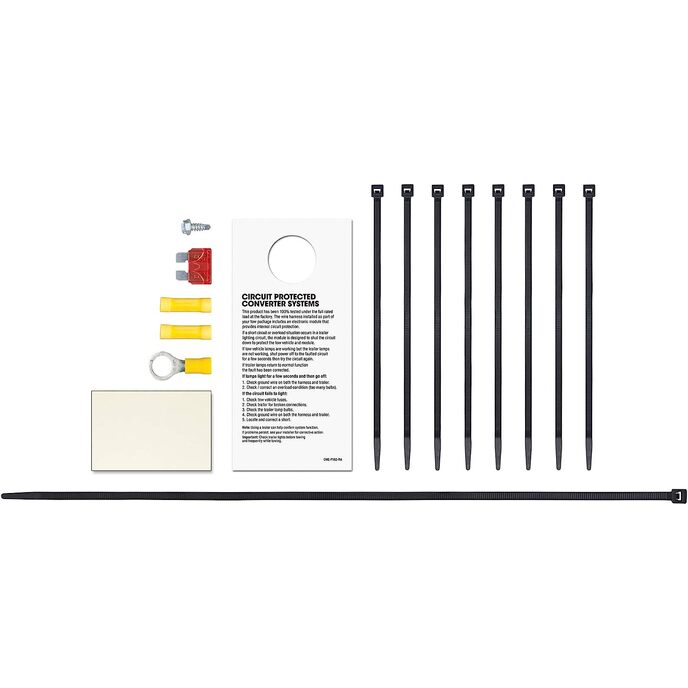
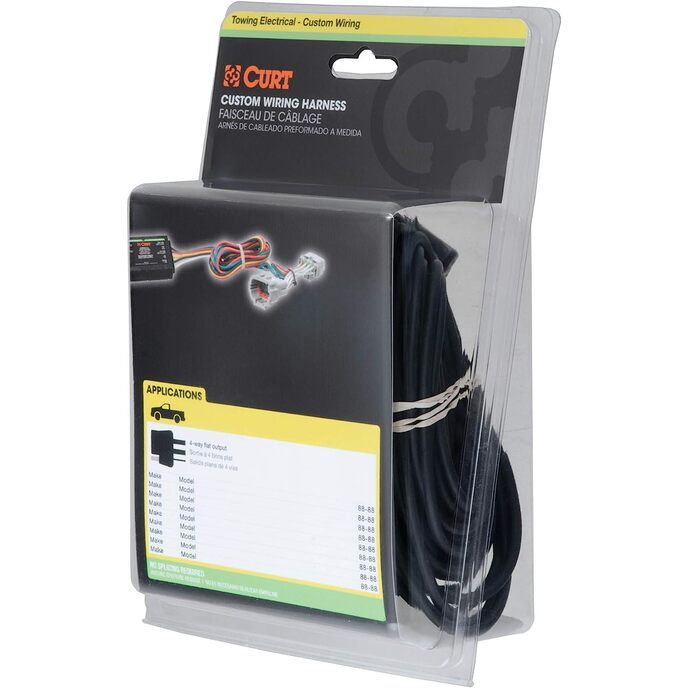
CURTi kohandatud juhtmestiku pistikud on lihtsaim viis oma sõiduki varustamiseks CURT-i haagise juhtmestikuga. Need on ehitatud tööstuse kõige arenenuma tehnoloogiaga ning igaüks neist on kohandatud töötama konkreetse margi ja mudeliga. Mõned autotootjad paigaldavad sõidukile spetsiaalse pistikupesa, mida kasutatakse sõiduki ja haagise juhtmestiku ühendamiseks. Kuigi see spetsiaalne pistikupesa ei ole igal sõidukil varustatud, kasutab CURT kohandatud juhtmekonnektor – mida nimetatakse ka T-pistikuks – pistikupesa lihtsaks ja pingevabaks paigaldamiseks. Selle asemel, et nõuda sõiduki juhtmestiku lõikamist, liitmist ja jootmist, kasutab kohandatud juhtmekonnektor üht originaalseadmete tootjaga ühilduvat pistikut ja tagab kohe standardse universaalse sõiduki ja haagise juhtmestiku, tavaliselt neljasuunalise ühendusena. tasane. Kõik CURTi kohandatud juhtmestiku pistikud on tehtud sõidukispetsiifilisteks, et tagada võimalikult lihtne paigaldus ja parim sobivus. See konkreetne pistikpistik pakub 4-suunalist lamedat pistikupesa ja on mõeldud Mitsubishi Outlander PHEV teatud aastate jaoks kohandatud juhtmestikuks (vajalik on tehase pukseerimispakett; sõiduki ühilduvuse kontrollimiseks vaadake rakenduse teavet). See on varustatud kogu vajaliku riistvaraga kindla ühenduse loomiseks. Kaasas on ka tolmukate, mis hoiab pistikupesa puhtana, kui seda ei kasutata. Pikaajalise töökindluse tagamiseks testitakse kõiki CURTi kohandatud juhtmeühendusi optimaalse funktsionaalsuse tagamiseks põhjalikult. Stress on viimane asi, mida peaksite haagise vedamisel tundma – olenemata sellest, kas vedate oma haagissuvilat sellesse lemmiklaagrisse, ATV-d jahimaadele või kalalaeva uude peidetud leviala. CURTis arvame, et teie pukseerimisvarustus peaks teie kogemust nautima, mitte seda vähendama.

TOLMUKATE. Pikaajalise kasutuse ja ilmastikukindluse tagamiseks on sellel 4-pooluselisel haagise valgustuse juhtmestikul kummist tolmukate. Kui seda ei kasutata, sobib see hõlpsasti 4-suunalise lamepistiku külge, kaitstes seda välistingimuste eest. USALDUSVÕIME. See 4-suunaline haagise juhtmestik on ehitatud pindpaigaldustehnoloogiaga. Seda tüüpi vooluringid toodavad vähem soojust, optimaalset valgustugevust ja vastupidavat jõudlust. SÕIDUKISPETSIIFILINE. See järelturu haagise juhtmestik on mõeldud Mitsubishi Outlander PHEV valitud aastate jaoks (vajalik on tehase pukseerimispakett). STANDARDÜHENDUS. Seda pistikühendusega nelja tasapinnalise haagise juhtmestikku saab kasutada haagise tagatulede, piduritulede ja suunatulede ühendamiseks. 4-suunaline haagise tulede juhtmestik on populaarne paljude haagiste puhul, lisades teie sõidukile mitmekülgseid pukseerimisvõimalusi. LIHTNE PAIGALDADA. Ei mingit lõikamist! Ei mingit splaissimist! See haagise juhtmestiku komplekt ühendatakse teie sõiduki olemasoleva tehasejuhtmestikuga ja varustab selle standardse 4-kontaktilise haagise juhtmestiku pistikuga haagise ühendamiseks ja pukseerimiseks.
Brand ‎CURT
Country of Origin ‎Mexico
Customer Reviews 2.7 2.7 out of 5 stars 17 ratings 2.7 out of 5 stars
Item model number ‎56412
Item Weight ‎15.7 ounces
Manufacturer ‎CURT
Manufacturer Part Number ‎56412
Model ‎Custom Wiring
Product Dimensions ‎9 x 6 x 3 inches

1.8

8 Review
5 Star
24
4 Star
6
3 Star
16
2 Star
29
1 Star
26

Kirjutage oma arvustus

Teie e-posti ei avaldata. Kõik kohustuslikud väljad on tähistatud tähisega*

Scritto da: L. Vang
Annoying Install but here are some tips
Wow!!! Not a fun install at all, but who said life was easy?!?! Everything I am sharing is assuming you e followed the curt instructions up to the point of connecting the adapters. Prior reviews have decent info about the reversed adapter/connector. My last photo shows the correct pin placement which other reviewers have also shared, thank you!! Key to remove is to pop open the flat piece/tab on the side, that unlocks the pins, then just as important is to use a super small flat head, like those for eye glasses, or another tiny needle like tool to remove each wire/pin. Each one is held down in their slot by another super tiny tab. If you look you’ll see a horizontal slit, use your tool and lift that plastic slit up and at the same time pull out the wire on opposite end. Easier with two people. Alone, sucks but doable. I’ve provided pictures and labeled each with the proper steps to access the vehicle connector piece. In picture 1, you’ll see another screw you can remove to give yourself a little more space. Number 2, is the panel tab you’ll need to gently pull out. Number 3 is a plastic fastener/screw that you pull out gently as well. In picture 4, you will find the connector taped down to that piece back there. Carefully use a box cutter/blade and make a few slices to remove the tape wrapped around it. This part stinks big time because you have the space of a couple fists to work with. Once you free it, you can then use the curt connector and connect the two pieces. I actually snaked the wires under the vehicle panels otherwise the wires will dangle out looking fugly! So, painstakingly, I had to undo the pins again, zip tied the wires together to snake easier behind the car panels, snaked the wires under the panels closest to the door hatch, cut and remove zip tie, then reconnected the curt connector again in the correct sequence. Instructions also don’t tell you that in the second little baggy, there is a red connector piece you’ll need to twist the red wire into it then attach to the positive battery terminal. Lastly, I did not drop the 4-flat wire through the panels to the outside as there are no instructions on how to do that so I’ll save that battle for another day. I left I’m hanging out in the back left cubby, which seems to work fine. Maybe someone will provide those instructions in the future. Hope this helps. Peace and blessing
Scritto da: Amazon Customer
Re-pinning necessary (with instructions on how I did it)
I'll tell you how I rewired it, although I would say this is a project for someone with at least some experience with car wiring (maybe car audio or the like). After reading the reviews, I bought this knowing their might be a wiring issue. I was hoping maybe it was just a bad batch, but mine was the same. I agree with many of the previous reviews. This is an issue that a company like Curt should fix. The instruction pictures are terrible. But I couldn't find another brand that would support the OEM wiring harness. So this is what I did. First, pull out the tray with that holds the jack and covers the battery (5 screws). Remove the screw that holds the cover for the tailgate door support. This will allow you to move it out of the way. I bent a metal piece that supports the rubber gasket, but just removed it and it seems OK. I think if you're careful, you could avoid that. Remove the trim piece that covers the bottom of the rear hatch. You can just pull up. No screws. Then loosen the driver side lower interior panel (4 screws I think, including the cargo net holders and one over the wheel well). You should be able to get enough access (about 3-4 inch gap) to look behind the panel. There is a second panel inside that can be loosened without any screws. Behind the the second you will find the wiring harness connector taped to another wiring bundle. I was able to separate them with difficulty. So here's where you need to make some changes to the Curt harness. If you plug in the harness as is, you will notice the wires in the vehicle side do not match up with the wires in the Curt harness. It appears Curt pinned the connector inverted (a mirror image). It seems like Curt was maybe looking at the wiring plan for the vehicle side of the connector rather than the trailer side. I am no expert at re-pinning, but was able to do it. First, there is a strip across the Curt connect close to the wires that needs to be pried up about 1/8". This locks the pins into place. All the wires, except for the bottom row center, need to be moved (4 of the 5 wires). I removed one pin at a time by pushing it out with a very small screwdriver, and moved it to the opposite side. Press the locking bar back down. Once you've done that, make sure it looks like the wires in the Curt harness seem to line up with the wires in the vehicle harness. It worked perfectly. I actually put the Curt box in the battery tray area and routed the trailer wiring wo I can retrieve it through the neg battery terminal access door. This would be a 5 start product if it didn't require modification.
Scritto da: Jaydee Griffith
Check the vehicle-side tow harness pins
Overall the tow harness seems to be working fine. The only reason it's 3 stars is because, like others in the reviews, I had an issue where one brake light wouldn't turn on, the other brake light was constant, and no turn signals. After fighting the wiring for longer than I care to admit, it appears Curt had a batch of wiring harnesses that had the pins reversed in the connector for the factory tow harness plug. If you run in to a lighting issue out of the box, I recommend you use a test light and ensure the pin order is correct on the Curt plug to the Mitsubishi connector. Once I figured out the issue, I was able to use a straight pick to disassemble the connector and reconfigure to the proper pin placement.
Scritto da: Jacob Glynn
Pin locations are wrong, you must adjust them to get it to work
Just like everyone else, my wiring was messed up. I bought a 4 pin tester and ran through everything and determined that the factory pin set does not alight with the pin set that the vehicle has that you plug in to. Once I determined that, I found the tab on the top of the wiring harness and used a mini screwdriver to pop it up. Once up, I used the same mini screwdriver to place on top of the pin of the wiring harness and pry up while simultaneously pulling on that cable from behind to pop it out. After a ton of time troubleshooting I was able to find the right pin selection to plug the harness in (last picture where everything is plugged in). Ran through all my tests on the tester and got exactly what I needed (tail lights, brake lights, and turn signals). I installed the positive directly to the battery under the terminal nut and then used the ground screw to ground right next to the negative on the frame. Thank you to all those who came before me for the ideas, I’m just adding some pictures and what the finalized outcome looks like for me. Best of luck!
Scritto da: Vish
Thank you everyone
Thank you so much Jacob Glynn and others for doing the research and finding out the correct pin-out. Re-wired the connector as recommended and it works like a charm on my 2021 outlander PHEV
Scritto da: TheBeerBaron
Does not work...Pinout doesn't match 2018 Outlander PHEV
Followed the site and obtained the correct model for my Mitsubishi PHEV and it does not work all. Very disappointed and is a waste of money. Everyone who bought this is having the same problem so there is clearly a problem that Curt has yet to confirm. So ridiculous that they won't validate this is not compatible when there are so many people here having the same problem and a Facebook group with dozens of people with the same problem!!! My right tail light lit up only, and nothing else. Turn signals, hazard lights, running lights. Same as everyone here. Curt do something about this as I can't get a refund and we are all wasting our money here...bloody criminals.
Scritto da: John Mac Neil
NOT FOR CANADIAN VEHICLES
I installed and only have a R/R brake light on constantly. Although I can not find any indication that this was not for Canadian Vehicles this is what I was told when I contacted the mfg. so don't buy it. Anyone from Canada should insure they don't make the same mistake.
Scritto da: richard gervais
ne marche pas
ne marche pas

Seotud tooted

Avastage meie rahvusvaheline võrgustik

Saadame 28 riiki, üle 200 000 toote. Olge kursis, tellige uudiskiri.

Array